
How to add a support email address in YakDesk
Customers email billing@ and support@ for different reasons, and those emails should reach different people. Each YakDesk support address turns incoming mail into tickets and can file them straight into a queue. Forward your own mailbox to it, and customers never see the YakDesk address.
Before you start
- A Growth or Agency plan (tickets are included)
- An Owner or Admin role in YakDesk
Plays silently with captions; the narrated version is on its way.
Transcript
Give each team its own support address, so email lands in the right queue.
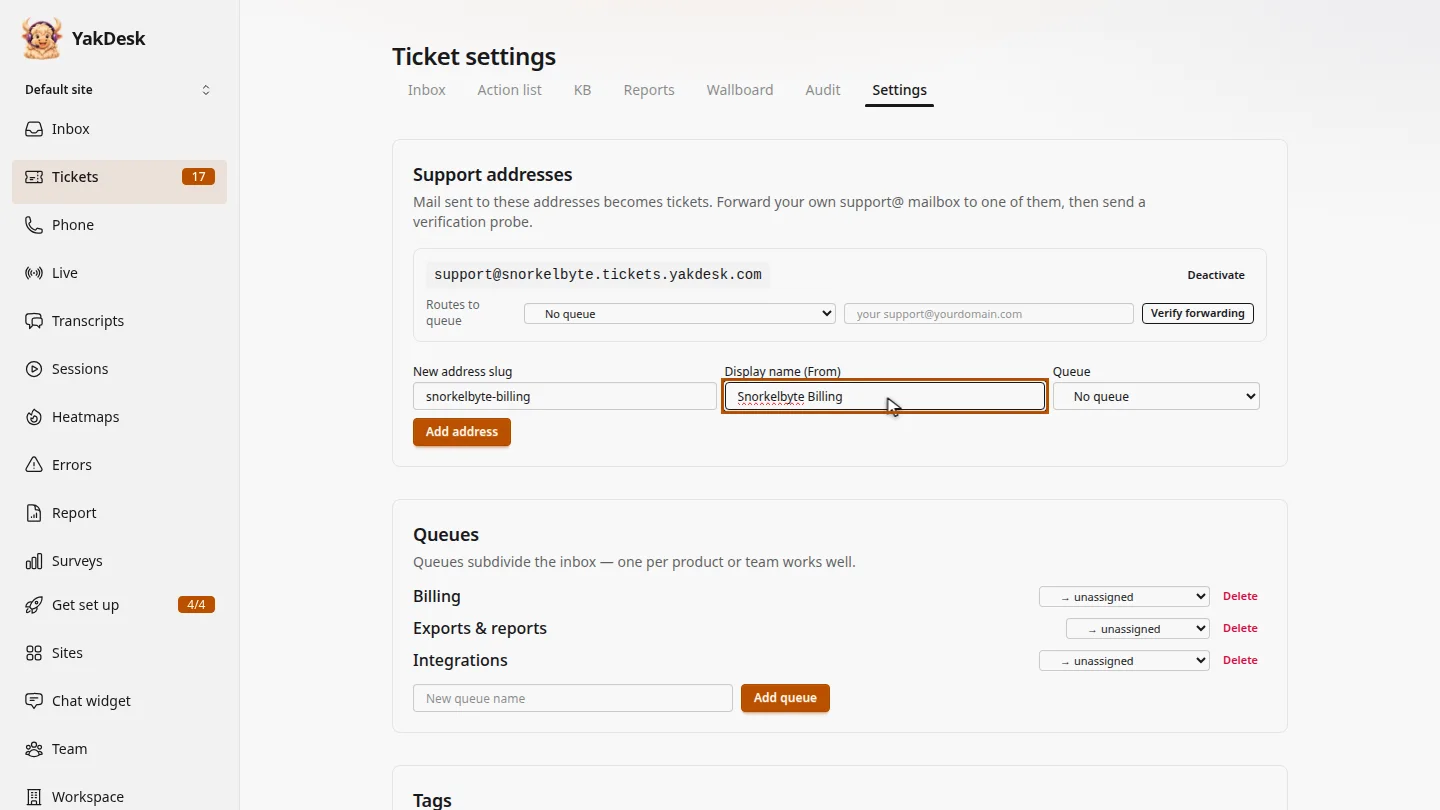
In Tickets, open Settings. Under Support addresses, enter a short name for the new address, and the name customers see on replies.
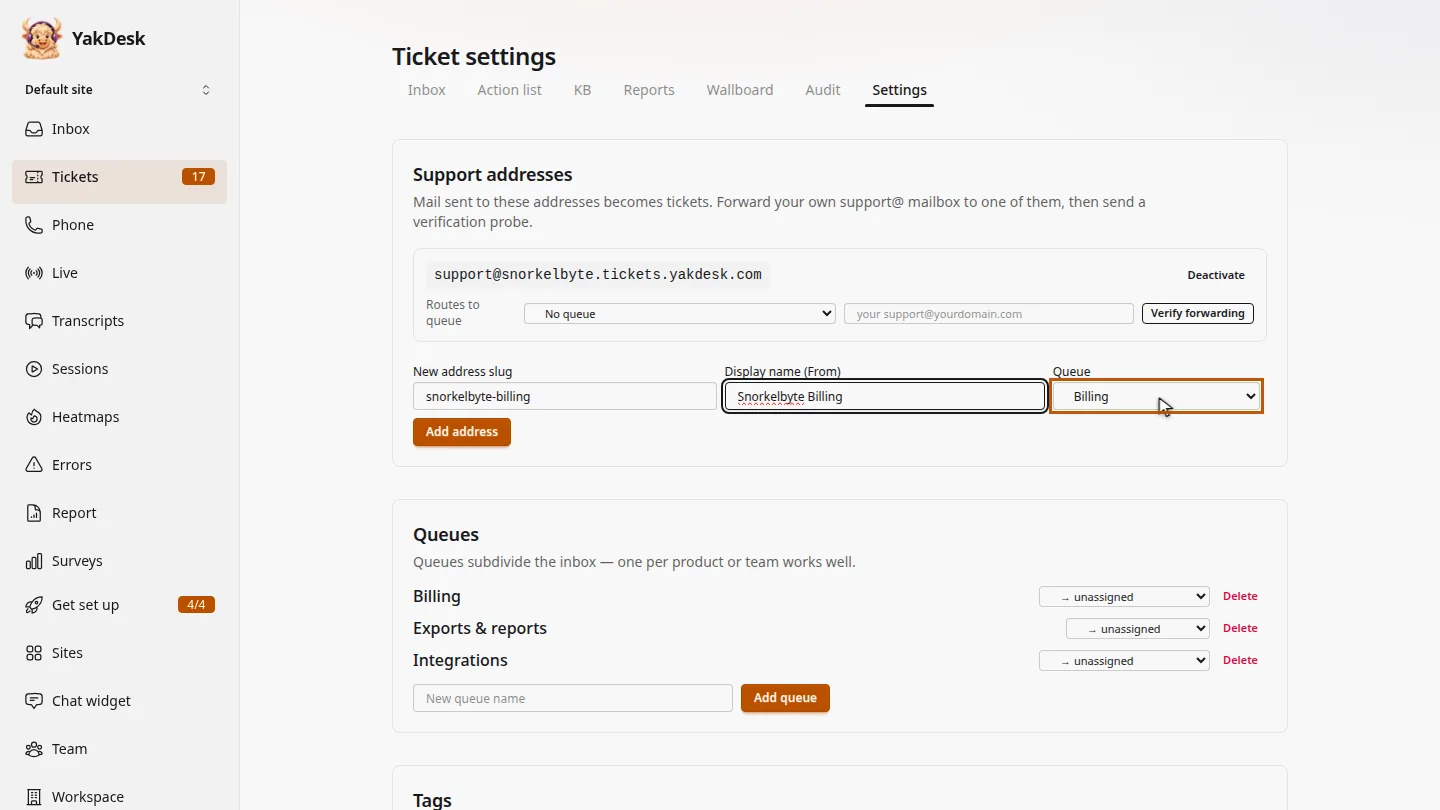
Choose the queue its tickets go to, such as Billing.
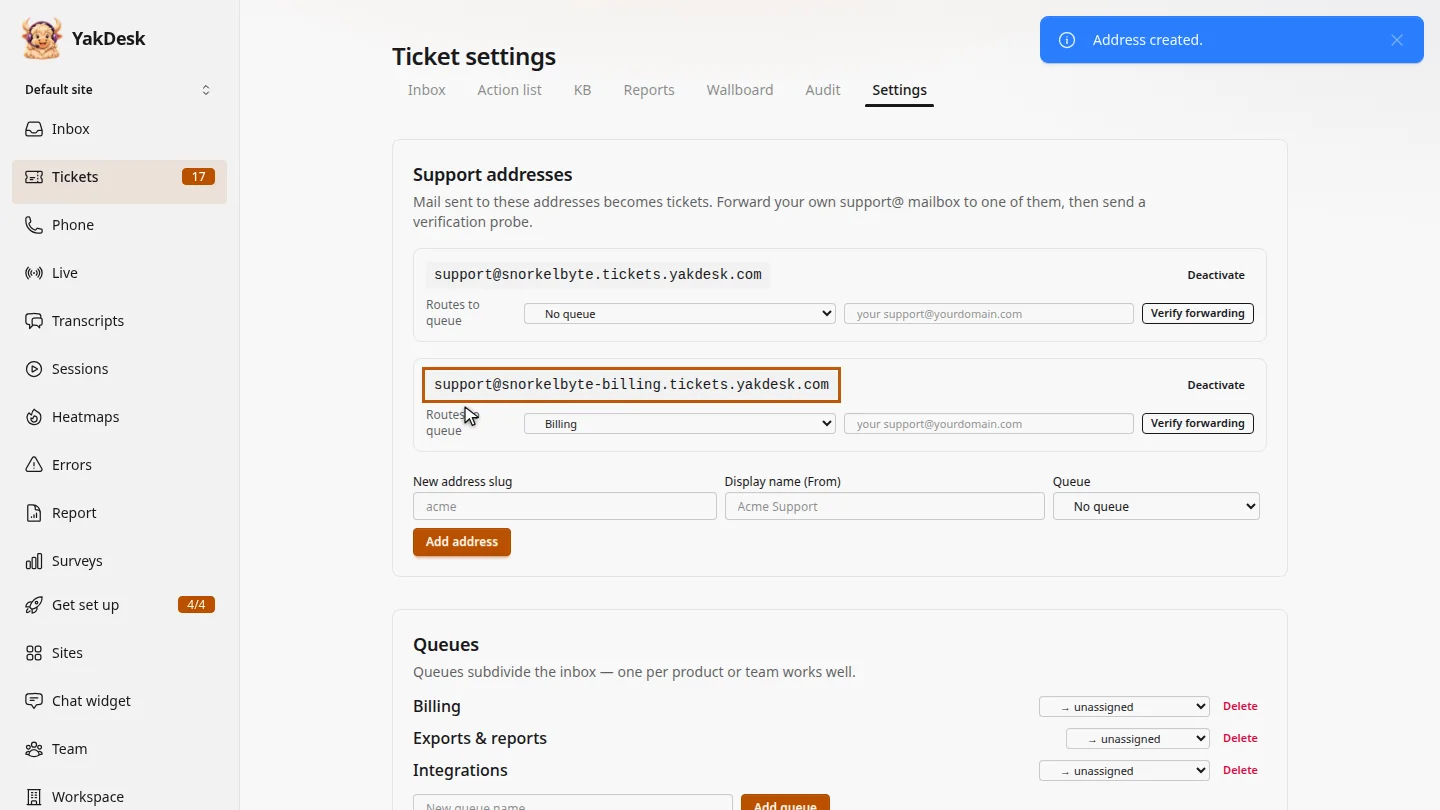
Select Add address. The new address is listed, routed to the Billing queue.
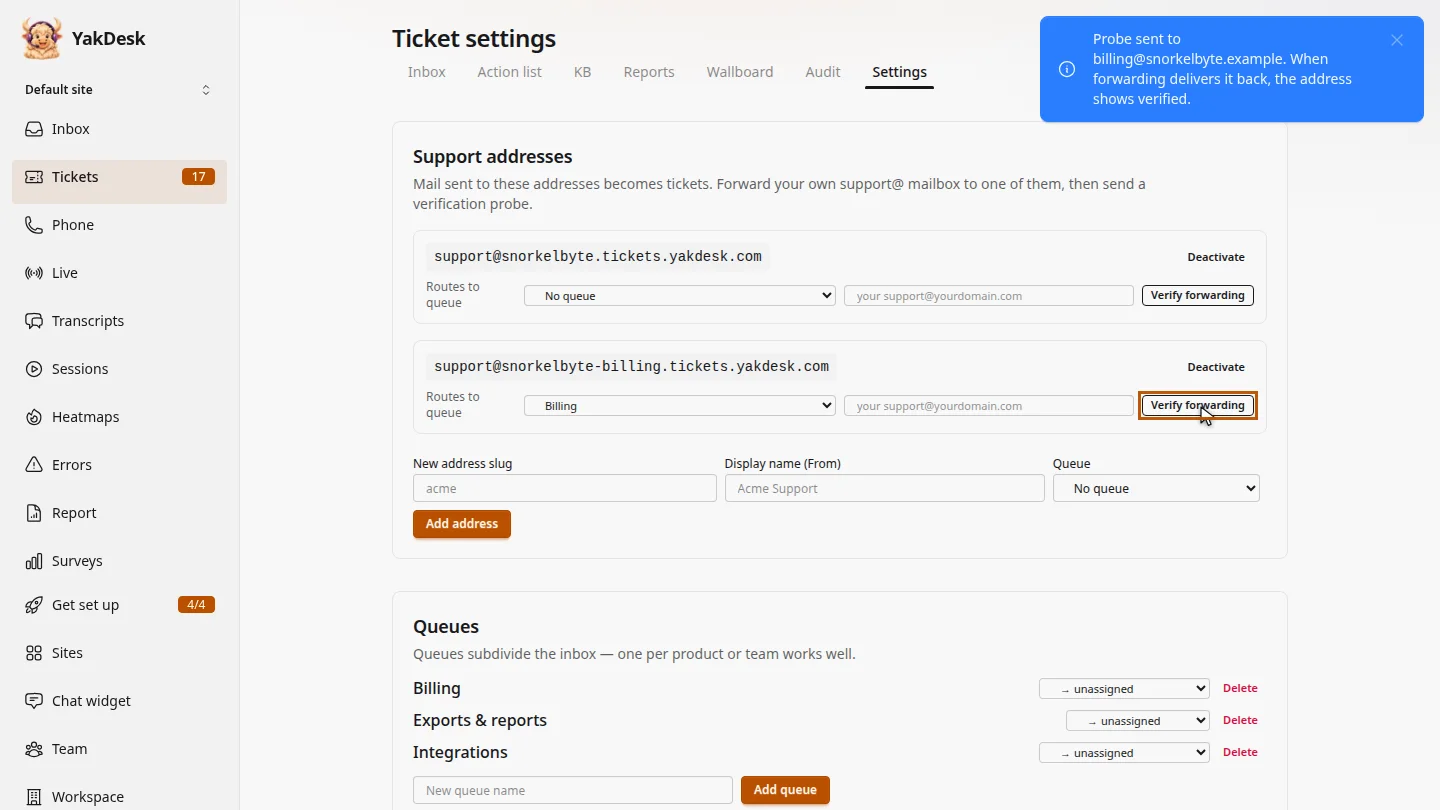
Forward your own billing mailbox to it. Then enter that mailbox and select Verify forwarding. YakDesk sends a test message, and marks the address verified when it comes through.
Steps
Name the address ▶ 0:06
In Tickets, select Settings. Under Support addresses, enter a New address slug and a Display name (From).
Pick a queue ▶ 0:16
For Queue, choose where its tickets go, for example Billing.
Add the address ▶ 0:20
Select Add address. The new address appears in the list with Routes to queue set.
Check your forwarding ▶ 0:26
In your email provider, forward your own mailbox to the new address. Back in YakDesk, enter that mailbox next to the address and select Verify forwarding. The address shows forwarding verified once the test message arrives.
Next steps
Updated 2026-11-09
email to ticket support address email forwarding inbound email ticket intake