
How to add an outbound webhook in YakDesk
Send ticket events to your own systems, for example to post urgent tickets to an on-call tool or sync tickets into a data warehouse. YakDesk sends a signed POST for each event, so your endpoint can verify it came from YakDesk.
Before you start
- A Growth or Agency plan (tickets are included)
- An Owner or Admin role in YakDesk
- An HTTPS endpoint that accepts POST requests
Plays silently with captions; the narrated version is on its way.
Transcript
Send ticket events from YakDesk to your own systems.
In Tickets, open Settings and scroll to Outbound webhooks. Enter the address that should receive the events.
Tick the events you want, such as new tickets and customer replies. If you leave them all clear, every event is sent.
Select Add endpoint. The endpoint is listed with its events. Open Reveal signing secret to copy the key your server uses to verify each request.
Steps
Enter the endpoint URL ▶ 0:05
In Tickets, select Settings. Under Outbound webhooks, enter the Endpoint URL.
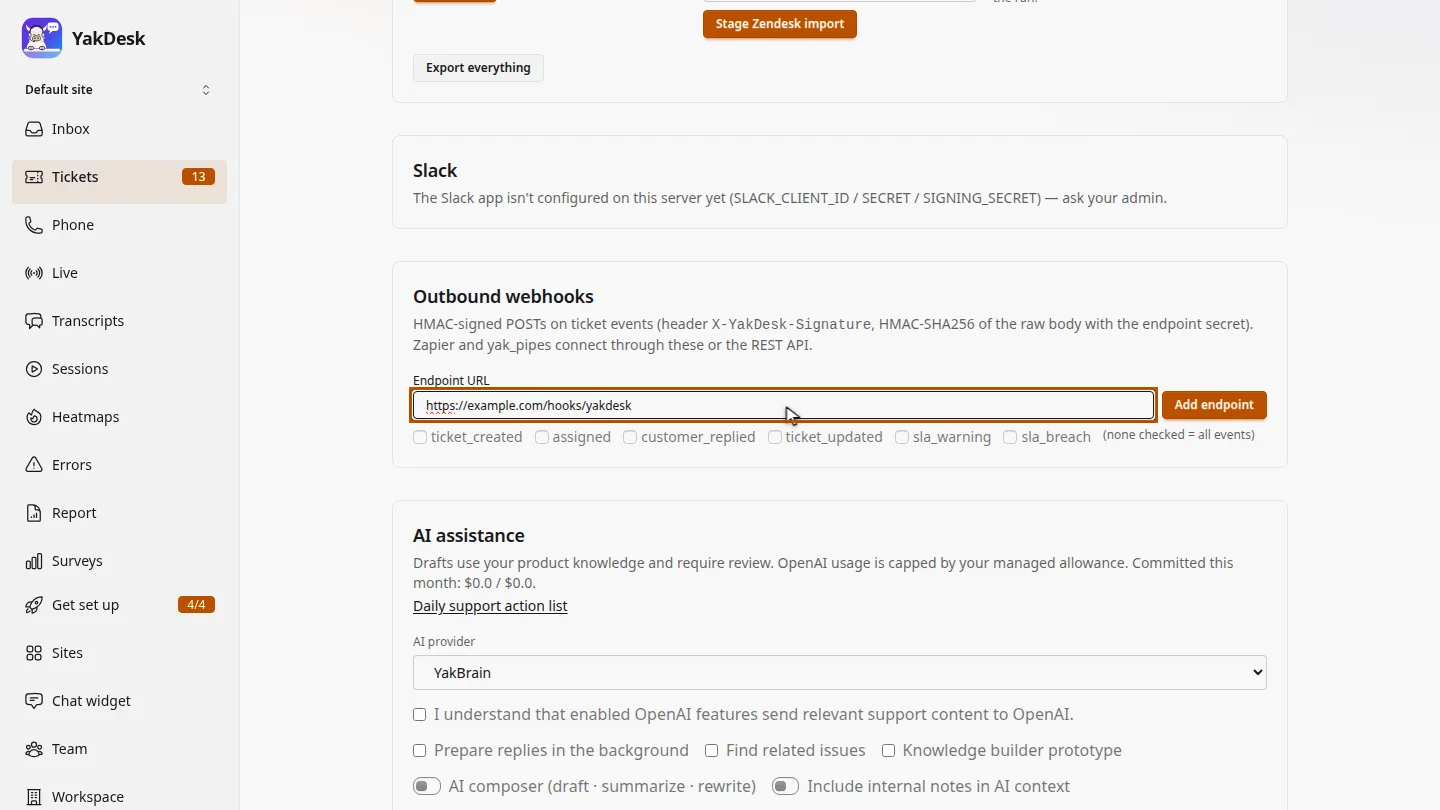
Choose the events ▶ 0:13
Select the events to send, for example ticket_created and customer_replied, or leave them all clear to send every event.
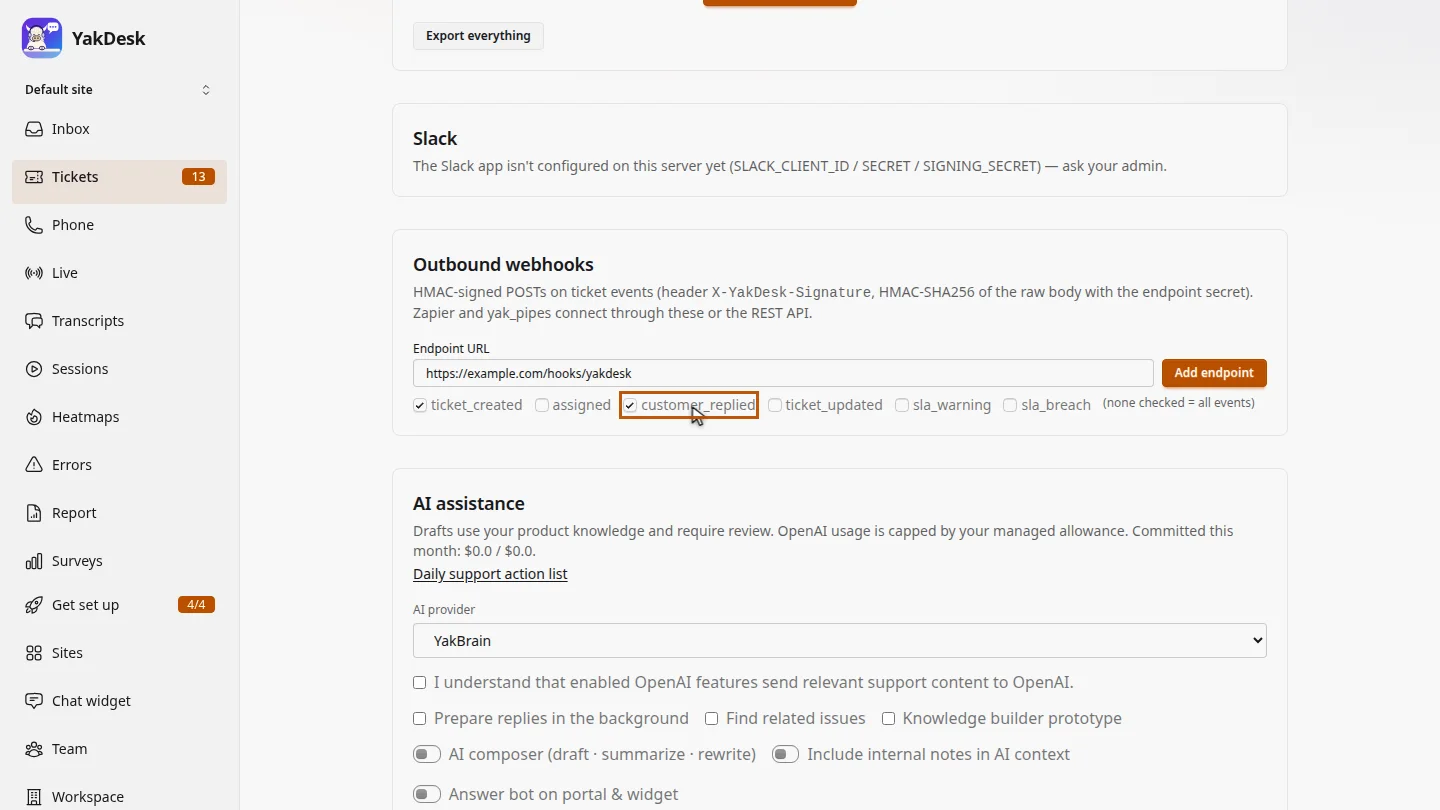
Add the endpoint ▶ 0:21
Select Add endpoint. Under the new endpoint, open Reveal signing secret to copy the secret.
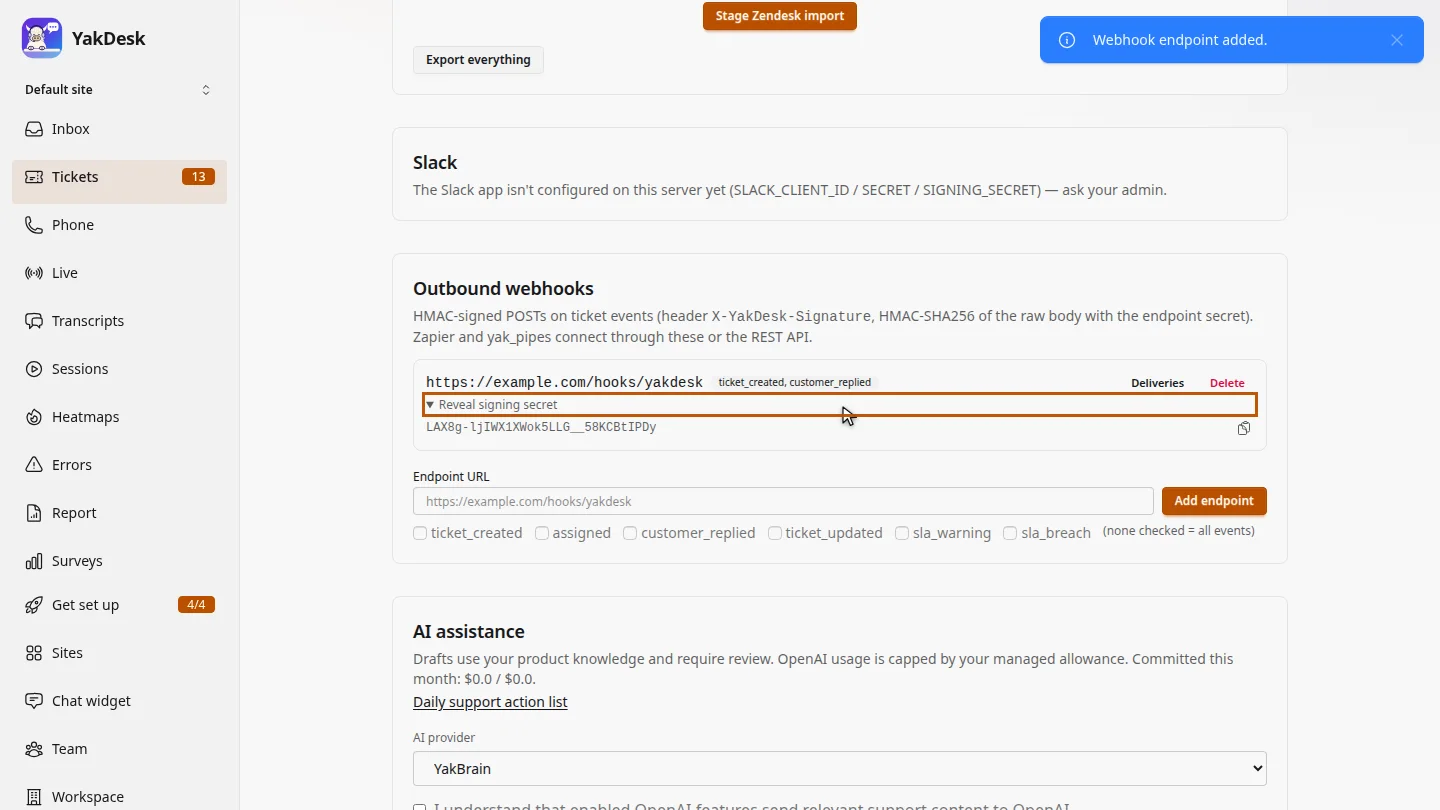
Next steps
Updated 2026-10-26
webhook zapier ticket events integration hmac signature