
How to add a custom ticket field in YakDesk
Some details come up in almost every ticket, like the customer's plan, order number or data source. A custom field gives that detail its own place on the ticket, so agents can fill it in, and you can filter tickets by it.
Before you start
- A Growth or Agency plan (tickets are included)
- An Owner or Admin role in YakDesk
Plays silently with captions; the narrated version is on its way.
Transcript
Record structured details on every ticket, like which data source a customer uses.
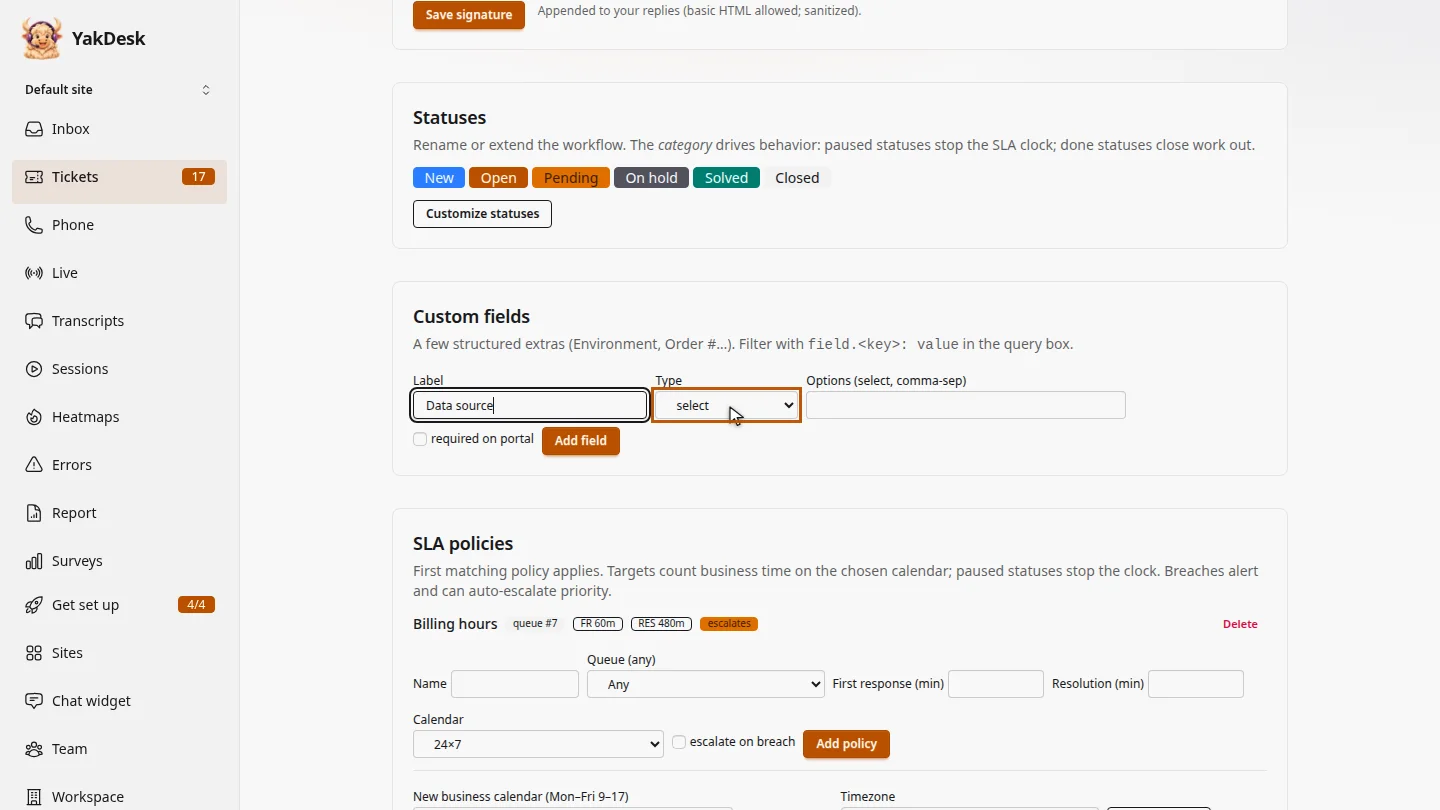
In Tickets, open Settings and scroll to Custom fields. Enter a label, and choose a type: text, select, number or date.
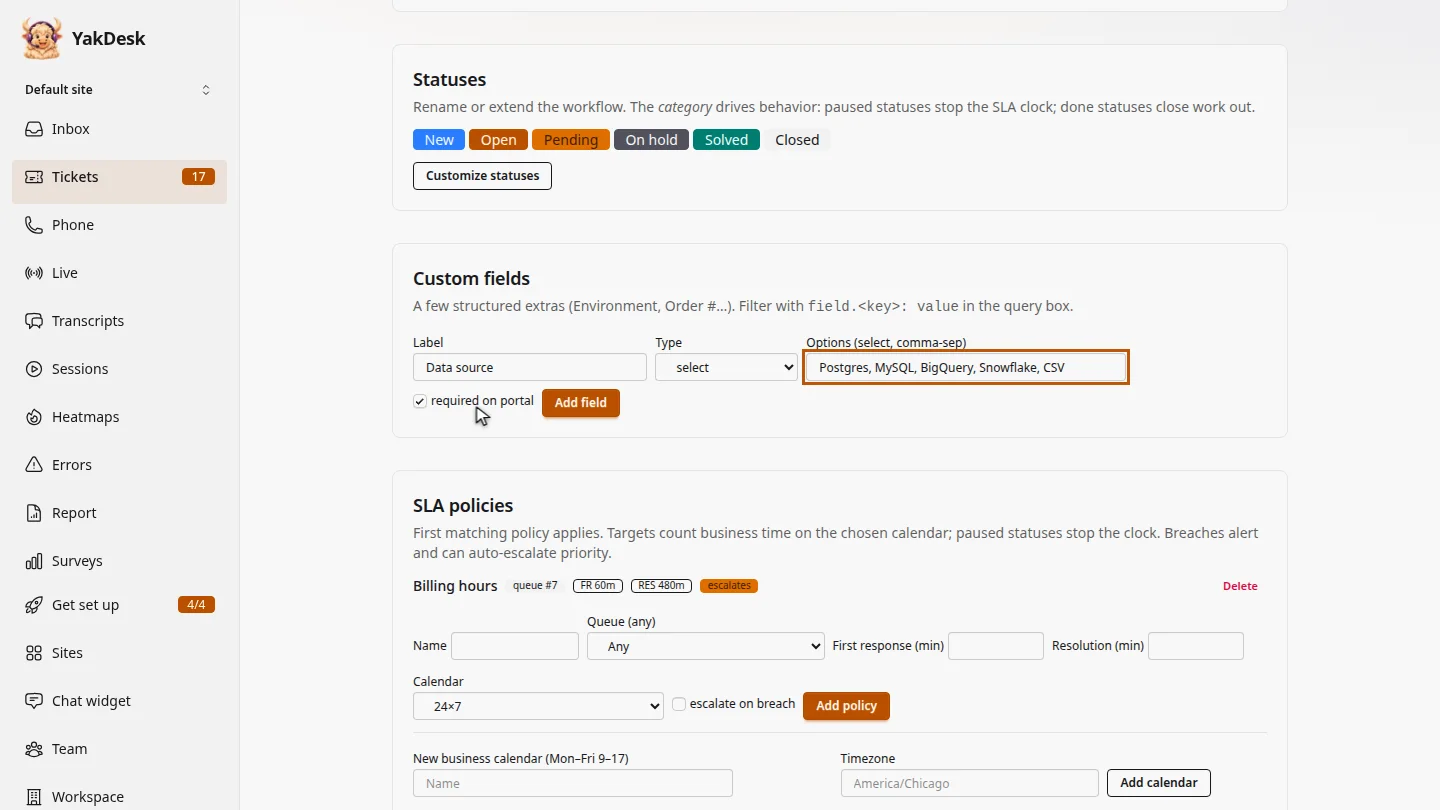
For a select field, list the choices, separated by commas. Optionally, tick required on portal, so customers answer it when they open a ticket.
Select Add field. The field is listed with its key, which you can use to filter tickets.
Steps
Name the field ▶ 0:07
In Tickets, select Settings. Under Custom fields, enter a Label and choose a Type: text, select, number or date.
List the choices ▶ 0:16
For a select field, enter the Options (select, comma-sep). Optional: select required on portal to make customers answer it on your help portal.
Add the field ▶ 0:26
Select Add field. The field appears in the list with its key. To filter tickets by it, type
field.data_source: Snowflakein the ticket search.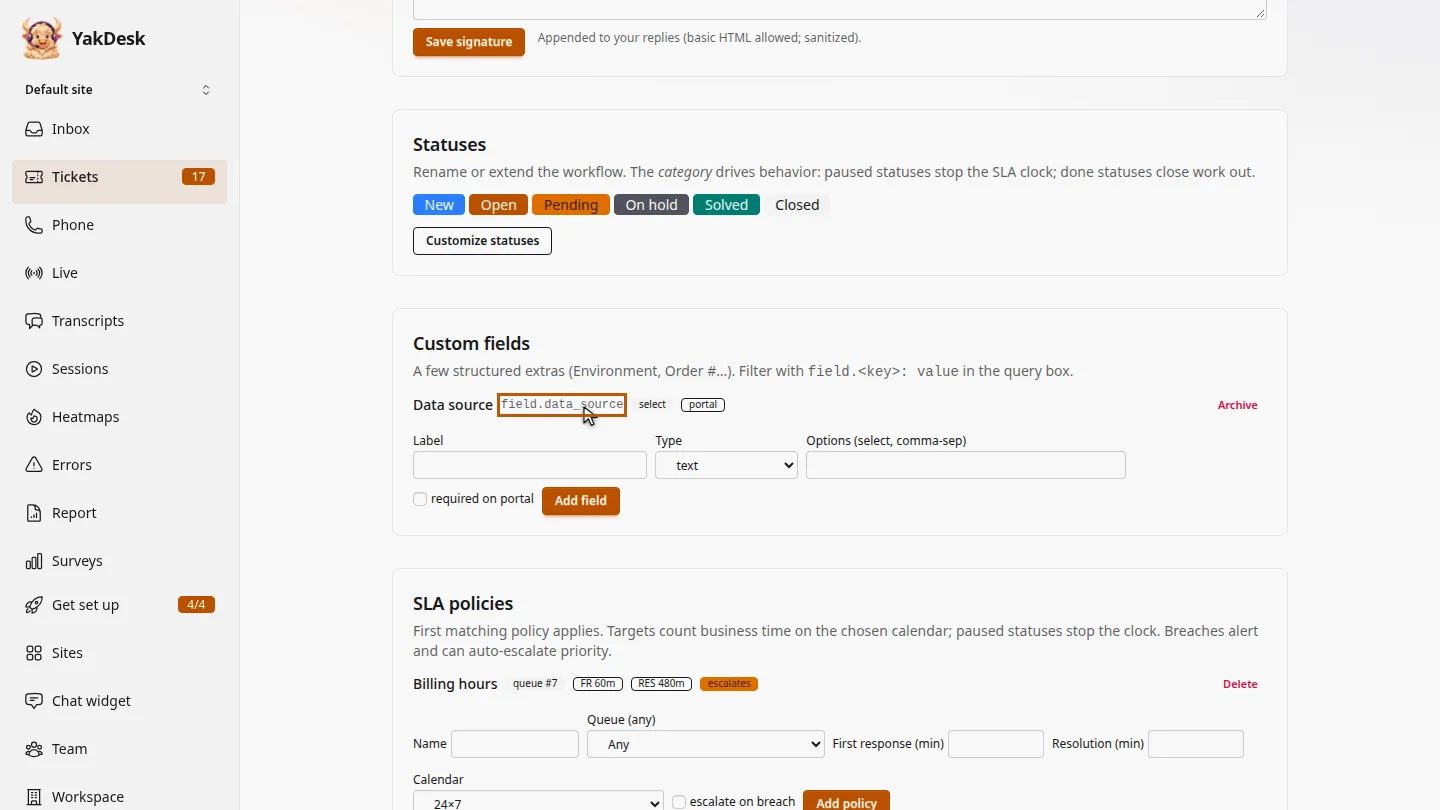
Next steps
Updated 2026-11-09
custom fields ticket fields structured data ticket form dropdown field