
How to add a routing rule in YakDesk
Tickets about the same problem should reach the people who can fix it, without someone sorting the inbox by hand. A routing rule looks for keywords in each new ticket and sets its queue and priority. Before you add it, YakDesk shows how many recent tickets it would have matched.
Before you start
- A Growth or Agency plan (tickets are included)
- An Owner or Admin role in YakDesk
Plays silently with captions; the narrated version is on its way.
Transcript
Send new tickets to the right queue automatically, based on what they say.
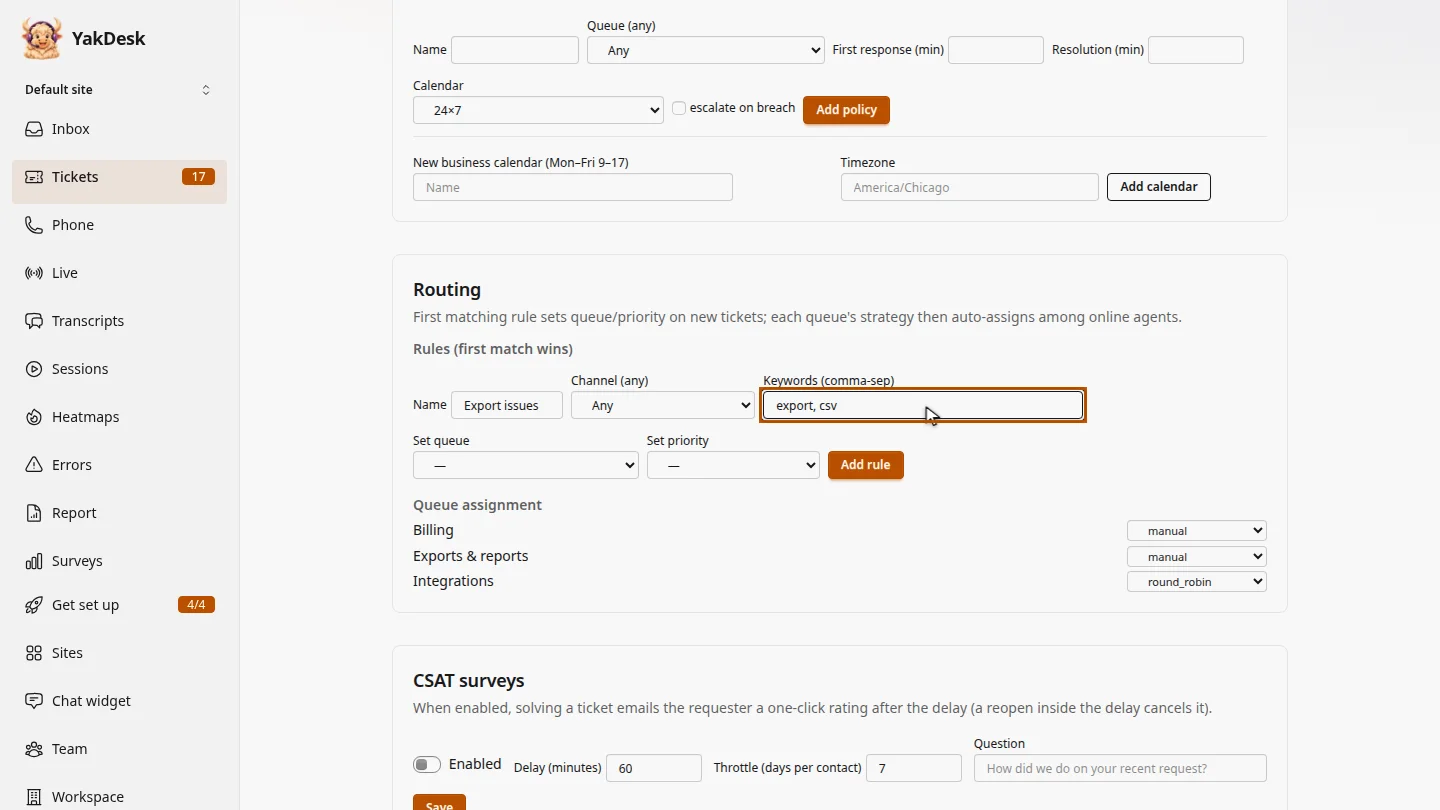
In Tickets, open Settings and scroll to Routing. Name the rule, and enter the keywords to look for, separated by commas.
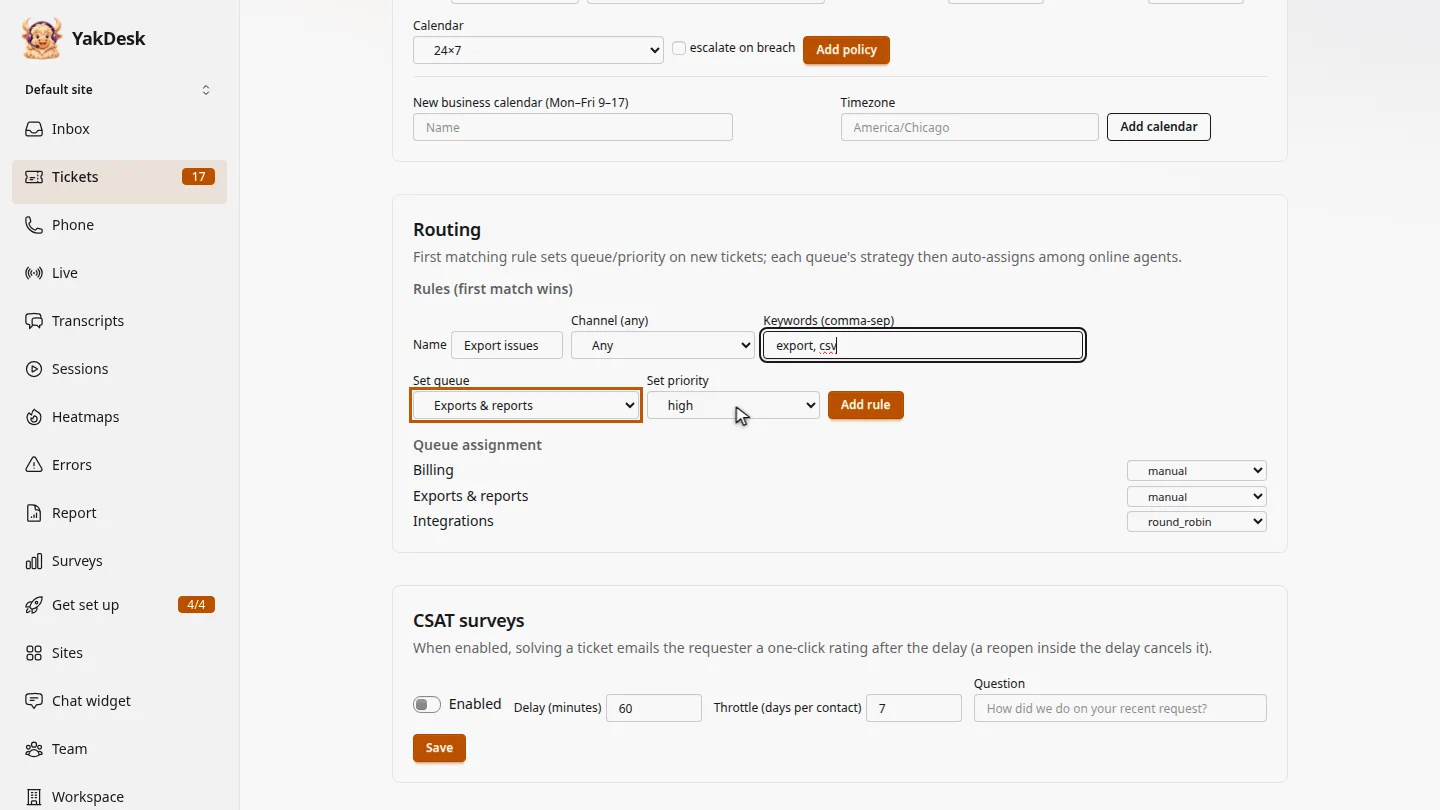
Choose the queue for matching tickets, and optionally a priority, such as high.
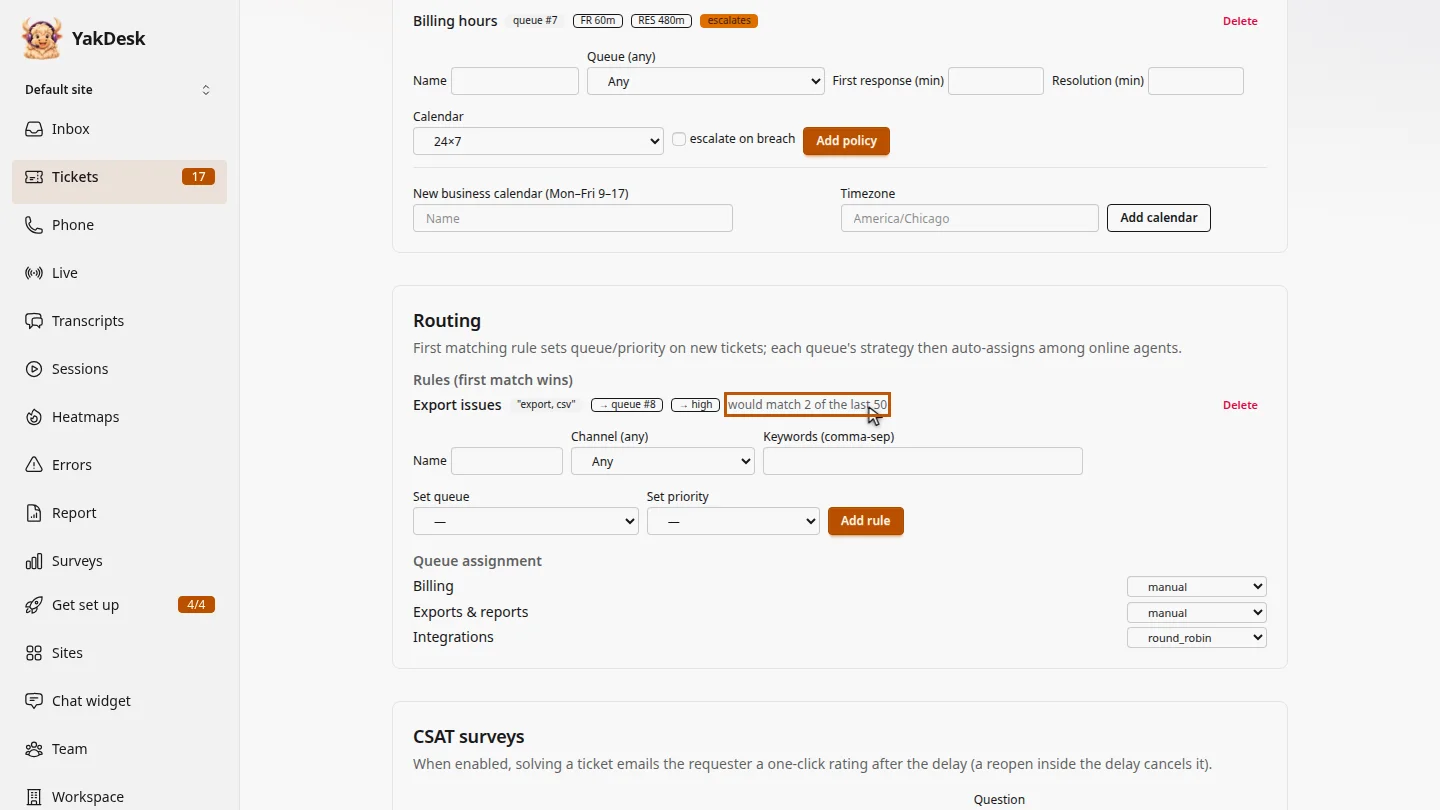
Select Add rule. The rule is listed with how many of your last 50 tickets it would have matched, so you can check it's not too broad.
Steps
Say what to match ▶ 0:06
In Tickets, select Settings. Under Routing, enter a Name and the Keywords (comma-sep) to look for. Optional: limit the rule to one Channel (any).
Say what to do ▶ 0:15
For Set queue, choose a queue. Optional: choose a Set priority.
Add the rule ▶ 0:21
Select Add rule. The rule appears under Rules (first match wins), with how many of the last 50 tickets it would have matched.
Next steps
Updated 2026-11-09
routing rules auto assign tickets triggers keyword routing ticket priority