
How to add a ticket queue in YakDesk
When one inbox holds billing questions, bug reports and integration requests, the right person has to dig for their tickets. A queue gives each team or product its own list, and YakDesk can assign the tickets in it automatically.
Before you start
- A Growth or Agency plan (tickets are included)
- An Owner or Admin role in YakDesk
Plays silently with captions; the narrated version is on its way.
Transcript
Split your ticket inbox into queues, one for each team or product you support.
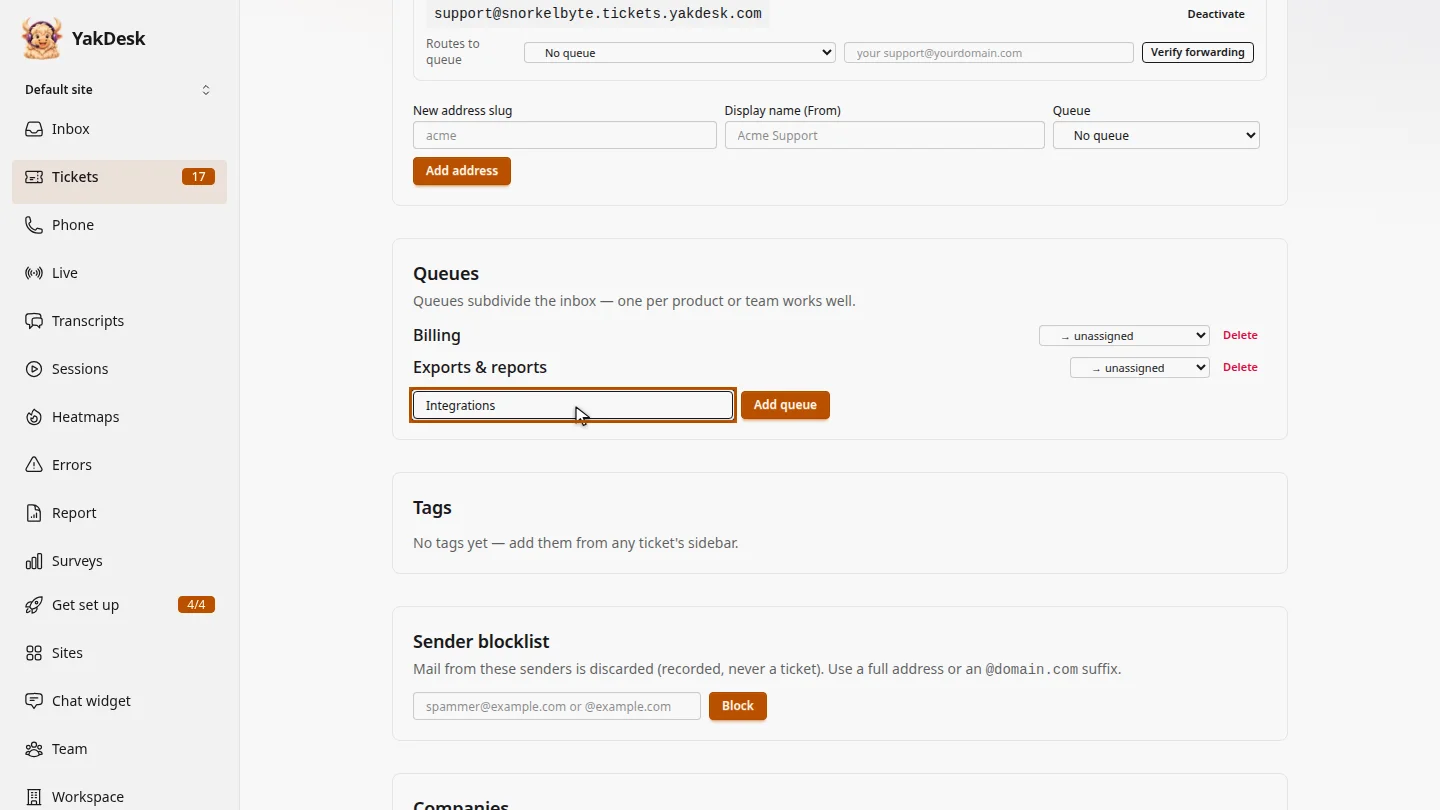
In Tickets, open Settings and scroll to Queues. Enter a name for the new queue, such as Integrations, for questions about connecting data sources.
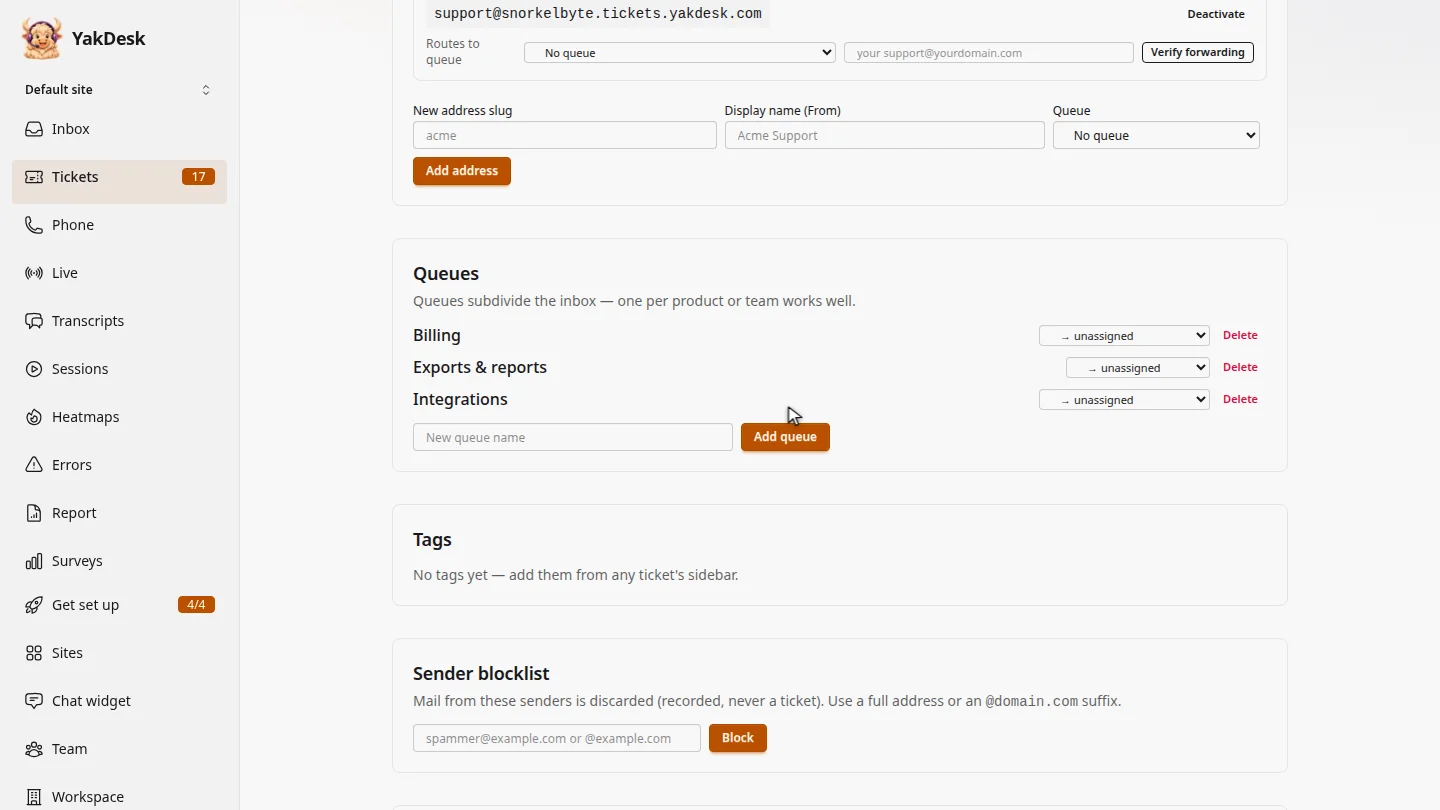
Select Add queue. Integrations joins the list, so tickets can now be filed under it.
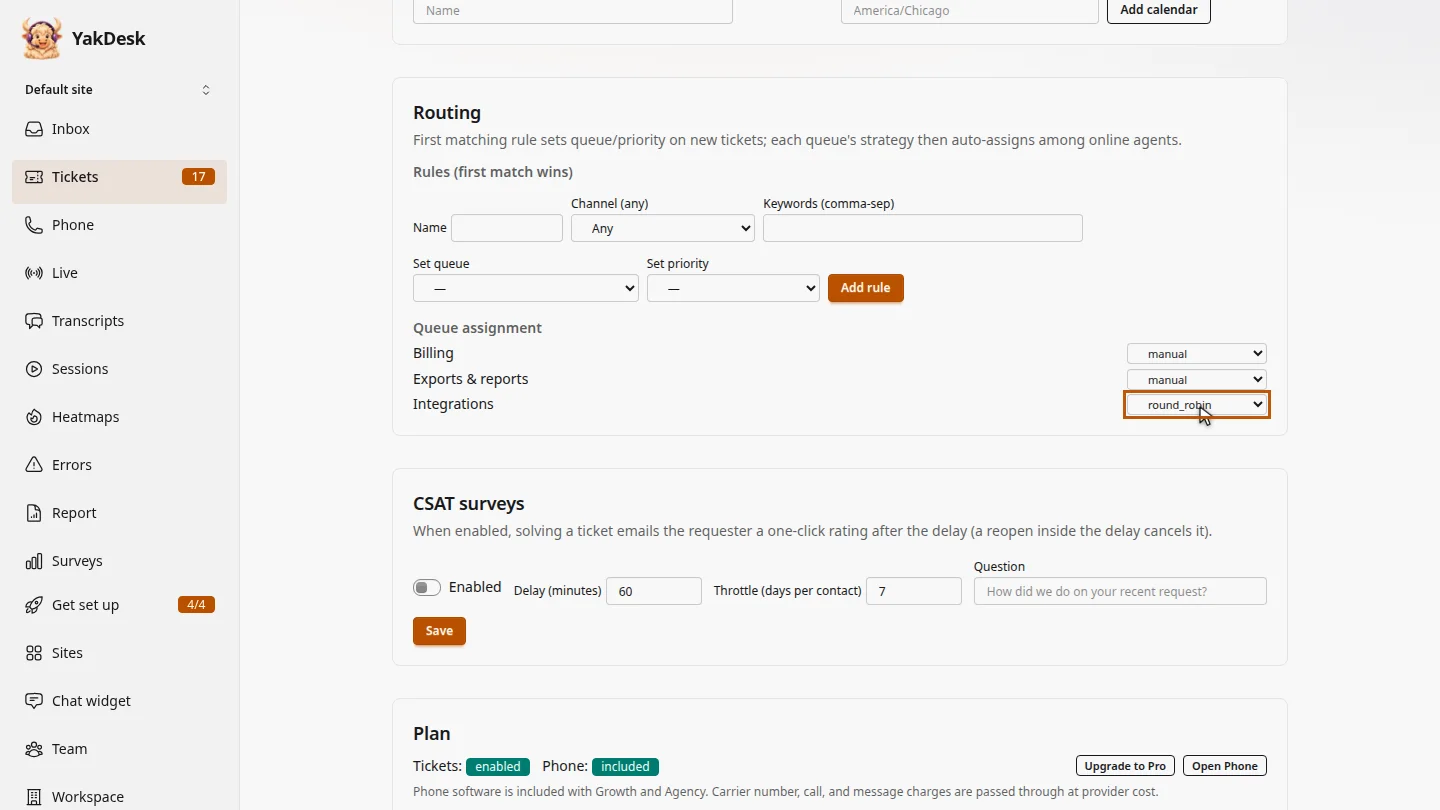
Optionally, under Queue assignment, choose how its tickets are assigned. Round robin shares them out among the agents who are online.
Steps
Name the queue ▶ 0:06
In Tickets, select Settings. Under Queues, enter a name in New queue name.
Add it ▶ 0:17
Select Add queue. The new queue appears in the list.
Choose how tickets are assigned ▶ 0:24
Optional: under Routing, in Queue assignment, choose a strategy for the queue. round_robin shares tickets among online agents; manual leaves them unassigned.
Next steps
Updated 2026-11-09
ticket queue departments round robin ticket assignment groups