
How to apply a command to selected tickets in YakDesk
Triage often means making the same change to many tickets, like taking every unassigned one or tagging a batch. A command applies that change to every selected ticket at once, and shows you what it will do before you apply it.
Before you start
- A Growth or Agency plan (tickets are included)
Plays silently with captions; the narrated version is on its way.
Transcript
Change many tickets at once with one short command.
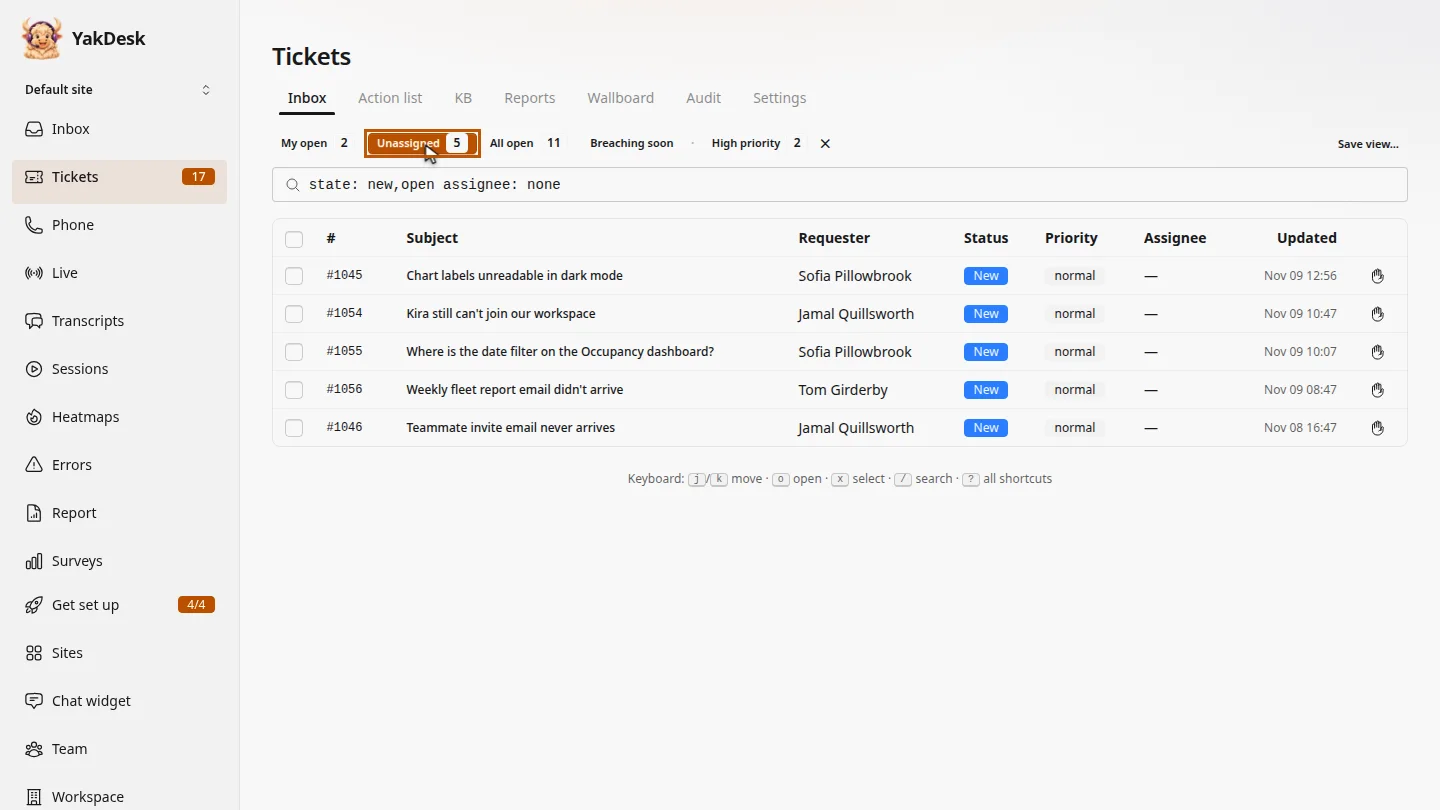
In Tickets, show the tickets you want to change. Select the Unassigned view.
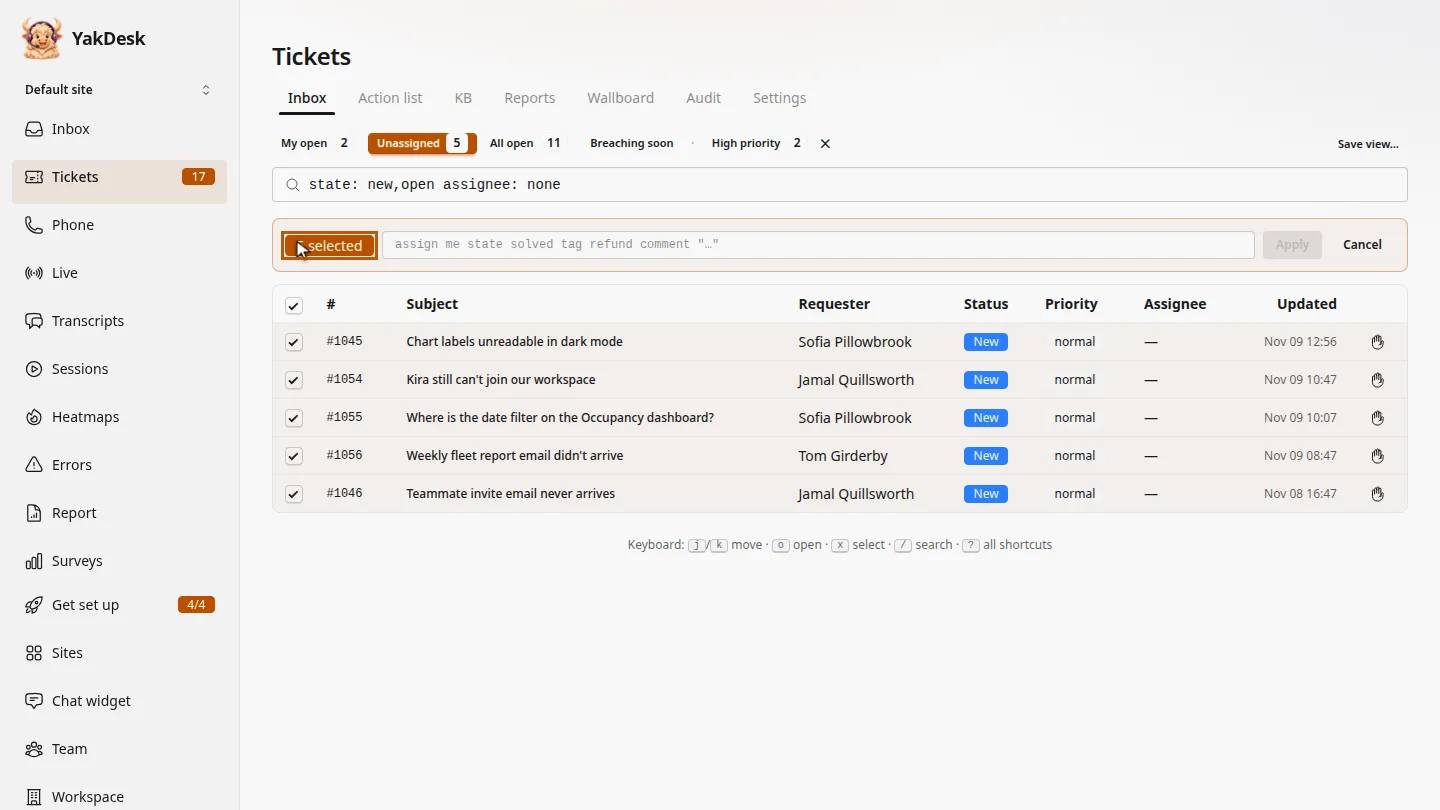
Select the checkbox in the header to select every ticket in the list. A command bar opens.
Type a command. Assign me takes them all. Before anything changes, YakDesk shows what the command will do.
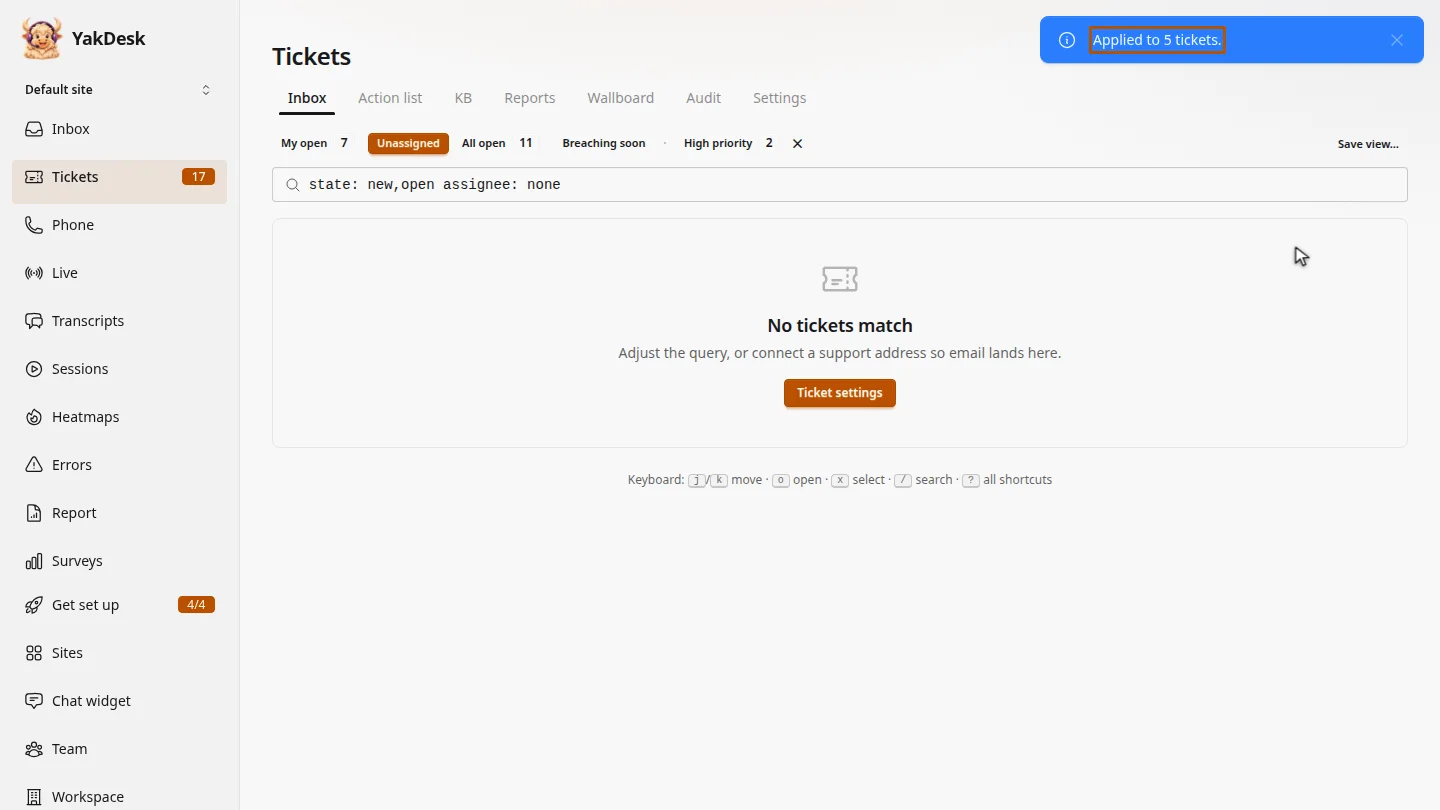
Select Apply. YakDesk confirms how many tickets changed, and they leave the Unassigned view.
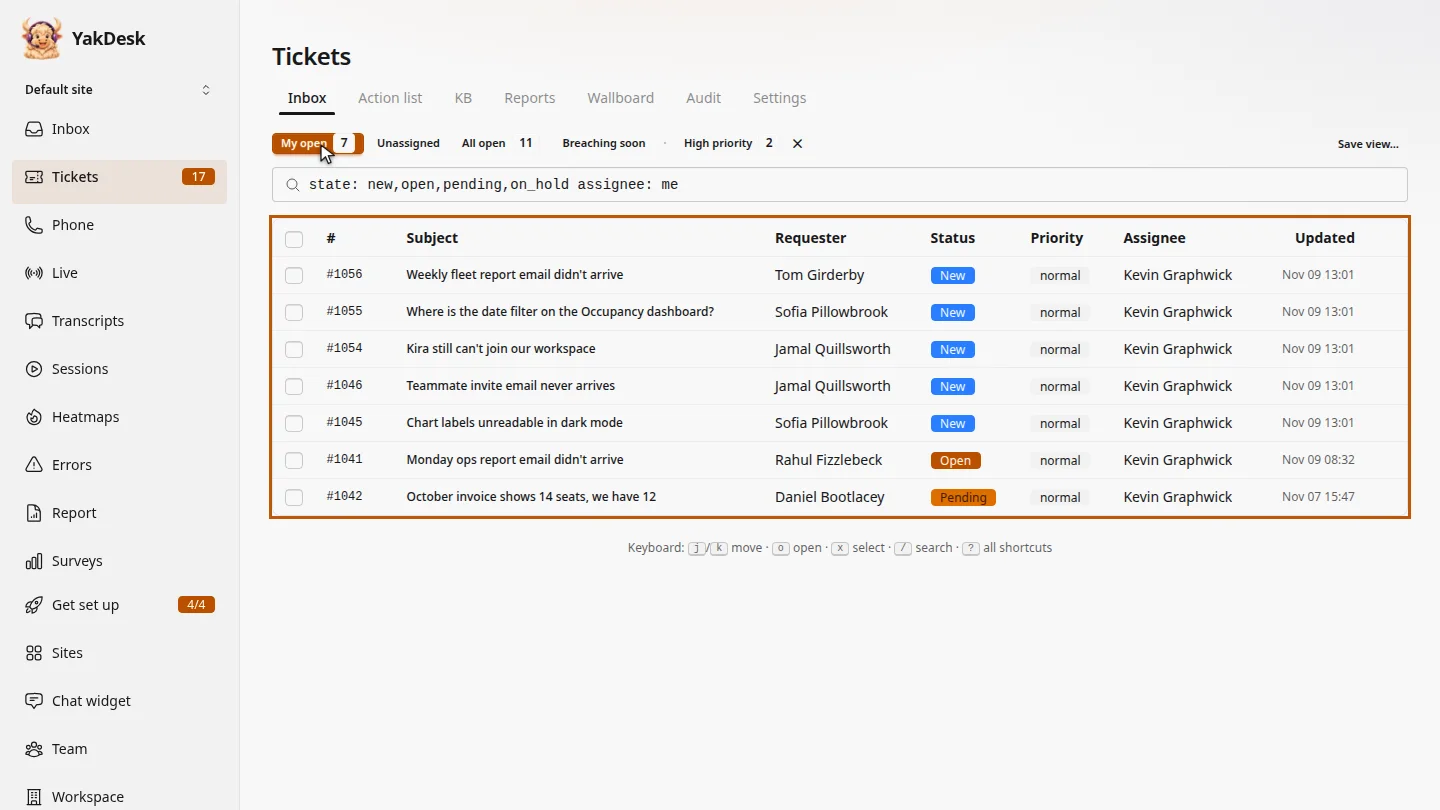
Select My open. The same tickets are now in your list, assigned to you.
Steps
Show the tickets ▶ 0:05
In the sidebar, select Tickets, then select a view or search, such as Unassigned.
Select the tickets ▶ 0:10
Select Select all (the checkbox in the header), or the checkbox on each ticket you want.
Type the command ▶ 0:17
In the command bar, type a command, such as
assign me. Check the Will: line before you apply it.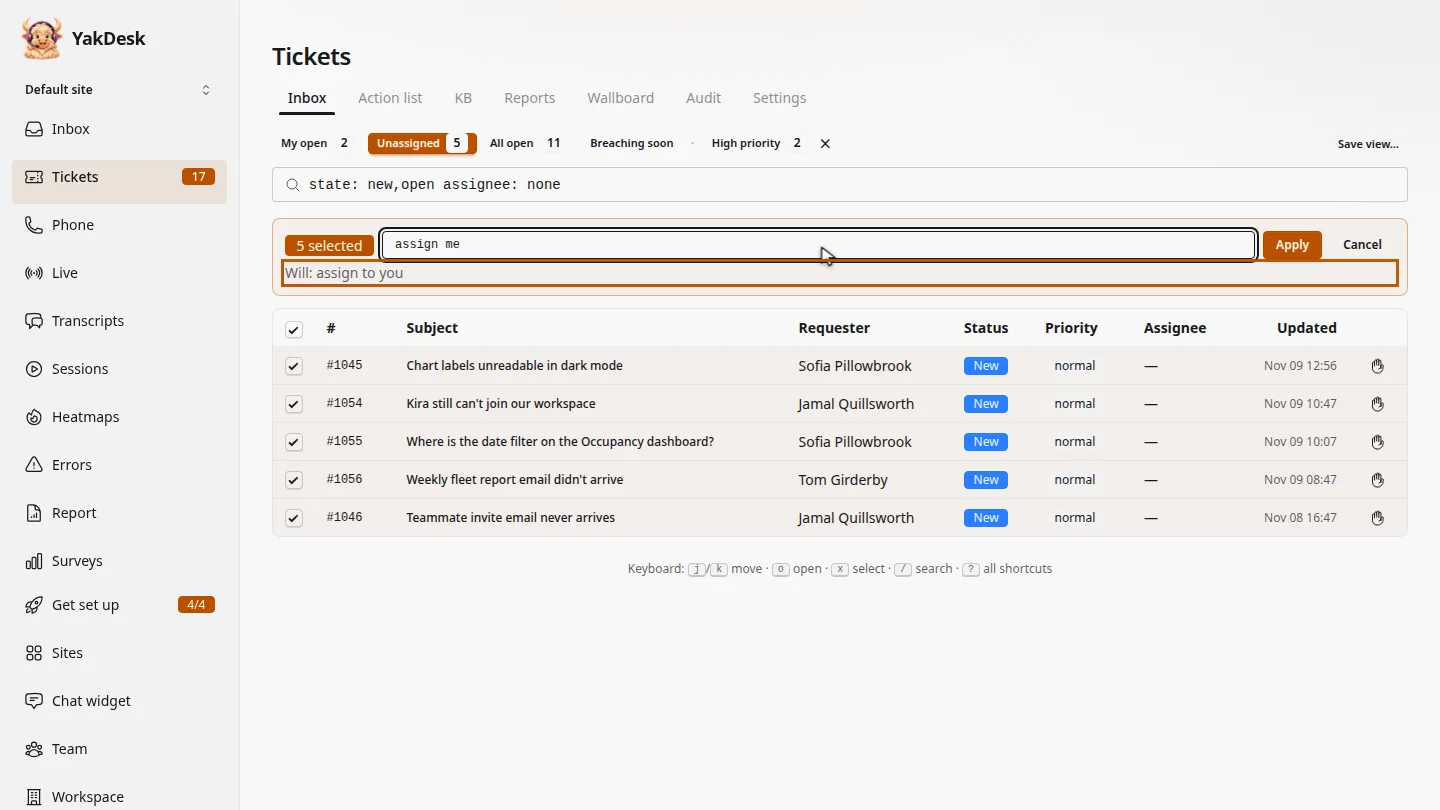
Apply it ▶ 0:25
Select Apply. YakDesk confirms Applied to and the number of tickets.
Check the result ▶ 0:32
Select My open. The tickets are listed with you as the assignee.
Next steps
Updated 2026-11-09
bulk edit bulk assign mass update command bar