
How to customize the chat widget branding in YakDesk
Make the chat window look like part of your product, not a third-party add-on. Set your brand color, a header title and your logo; the preview shows the result before visitors see it.
Before you start
- An Owner or Admin role in YakDesk
Plays silently with captions; the narrated version is on its way.
Transcript
Make the chat widget look like part of your own product, with your colors, title and logo.
Open Chat widget. Under Widget branding, pick your Brand color. The preview on the right changes straight away.
Change the Header title to the name your customers know you by.
Optionally, paste the web address of your logo image into Logo URL. Leave it blank to keep the default header.
Select Save branding. Visitors see the new look the next time they open the chat.
Steps
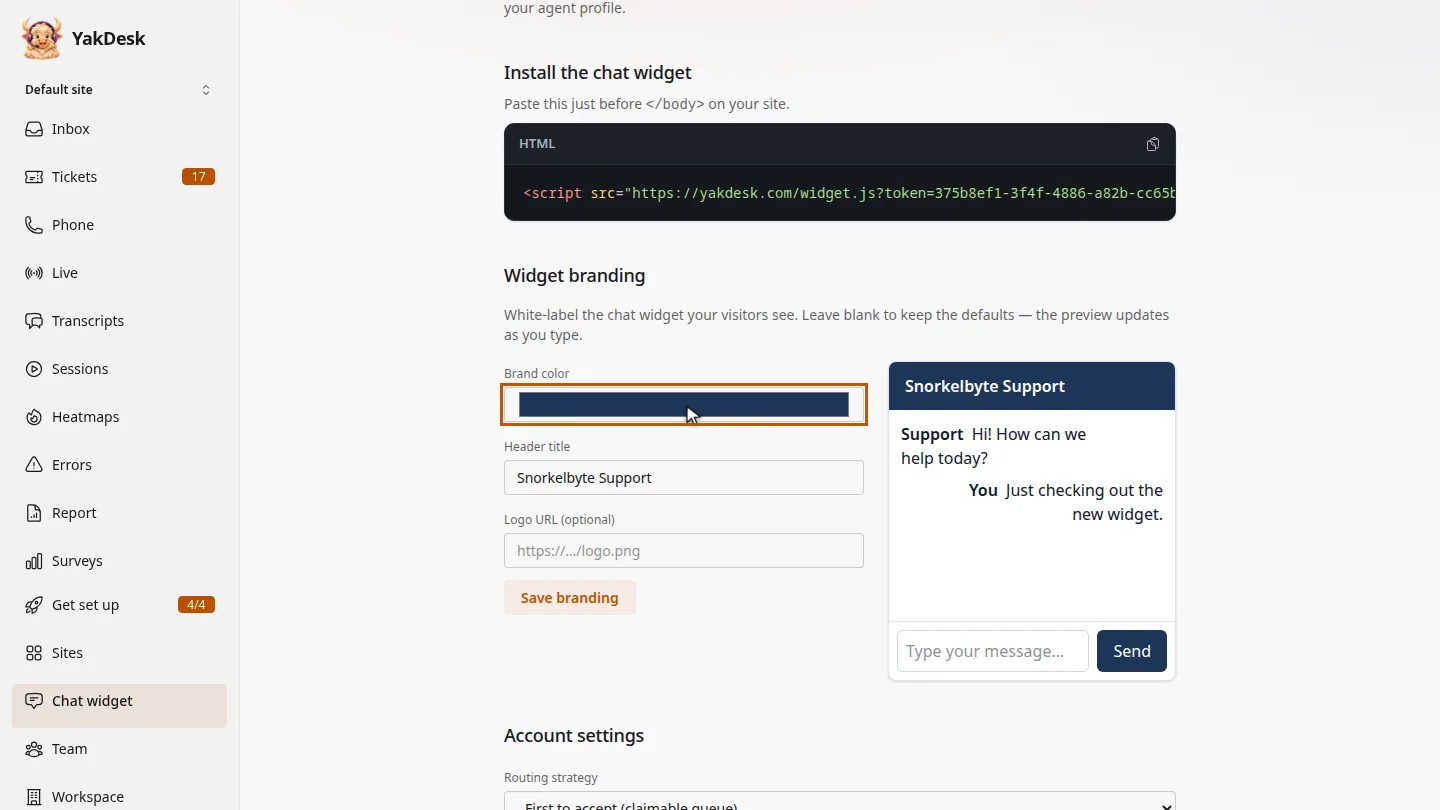
Pick a brand color ▶ 0:07
In the sidebar, select Chat widget. Under Widget branding, choose a Brand color.
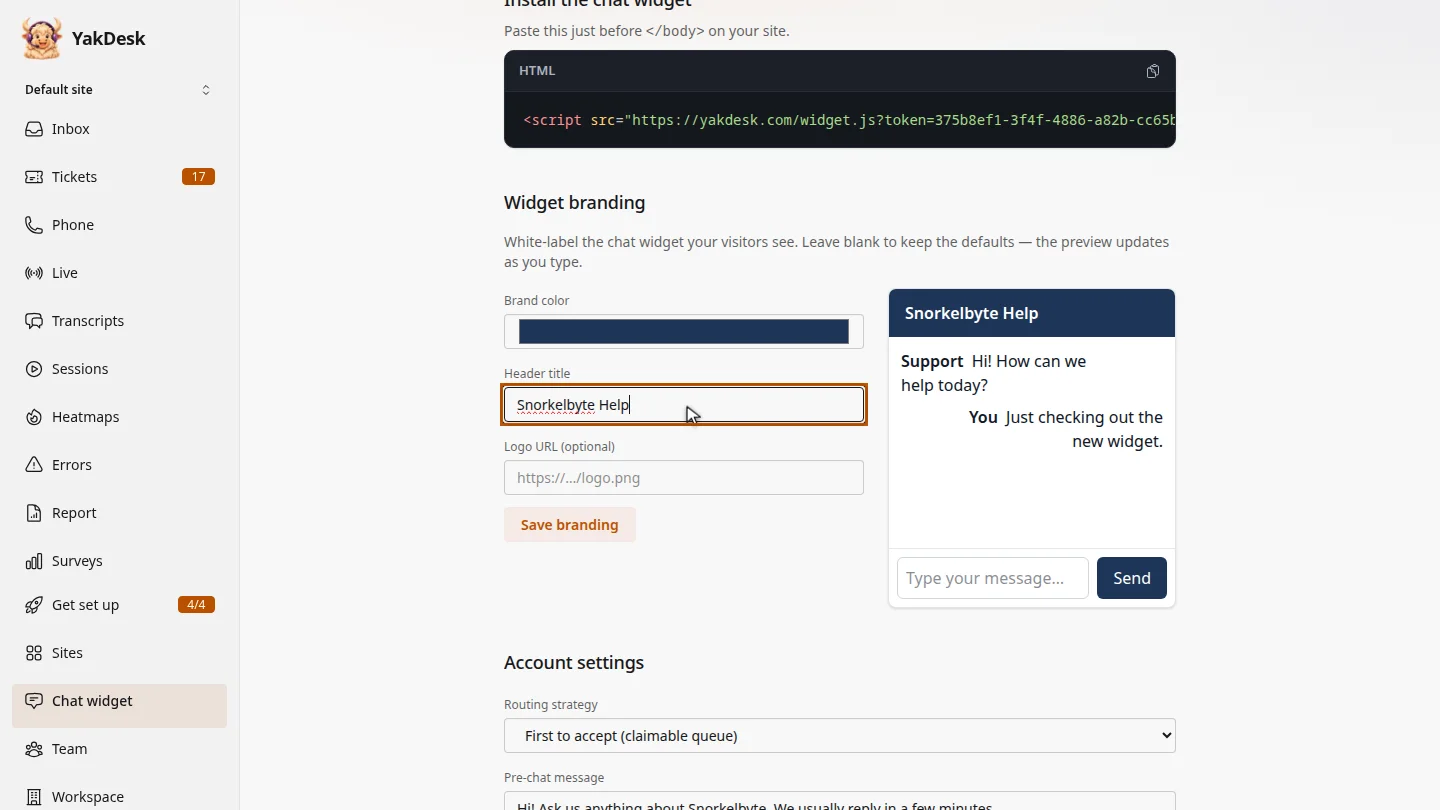
Set the header title ▶ 0:16
Enter a Header title. The preview updates as you type.
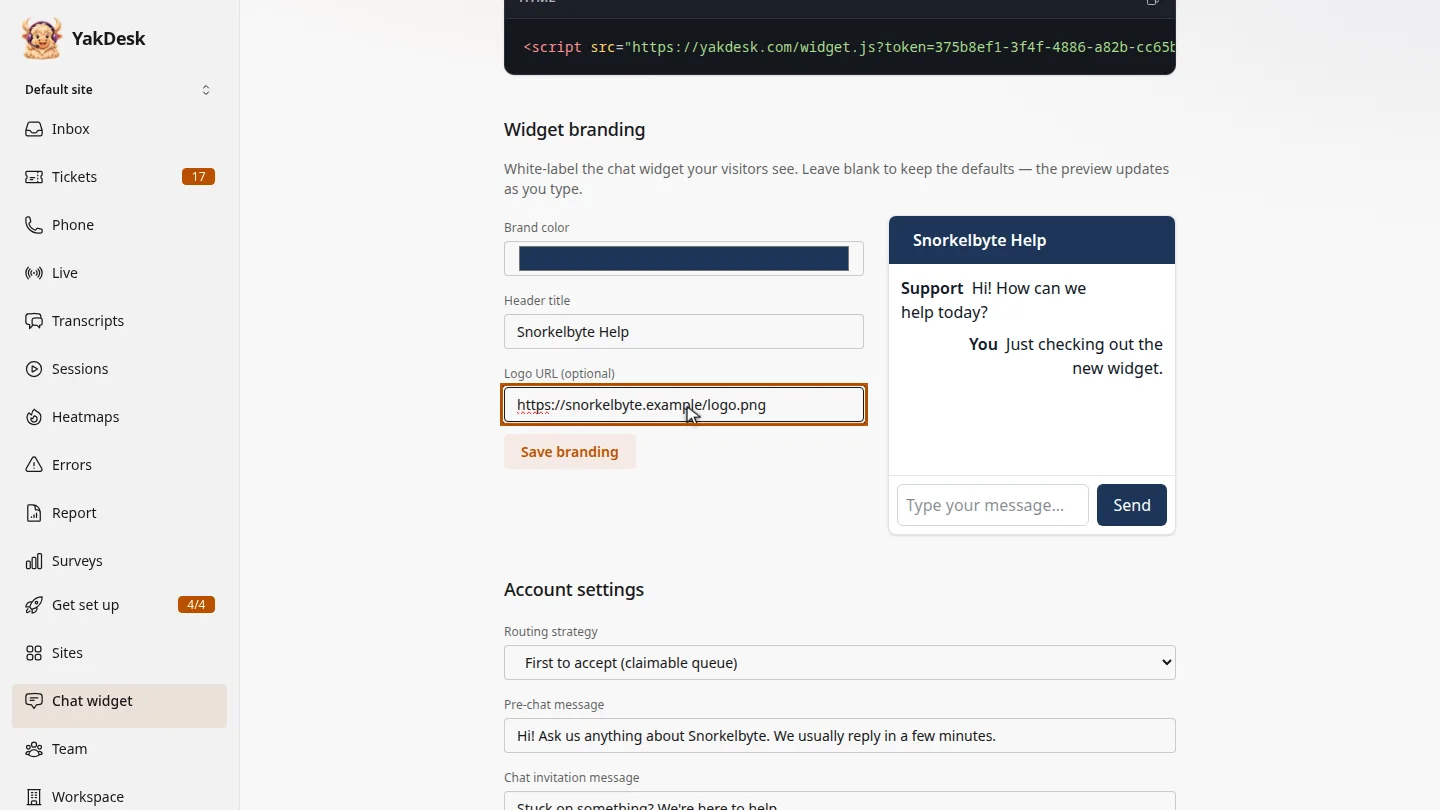
Add your logo ▶ 0:21
Optional: in Logo URL (optional), enter the address of your logo image.
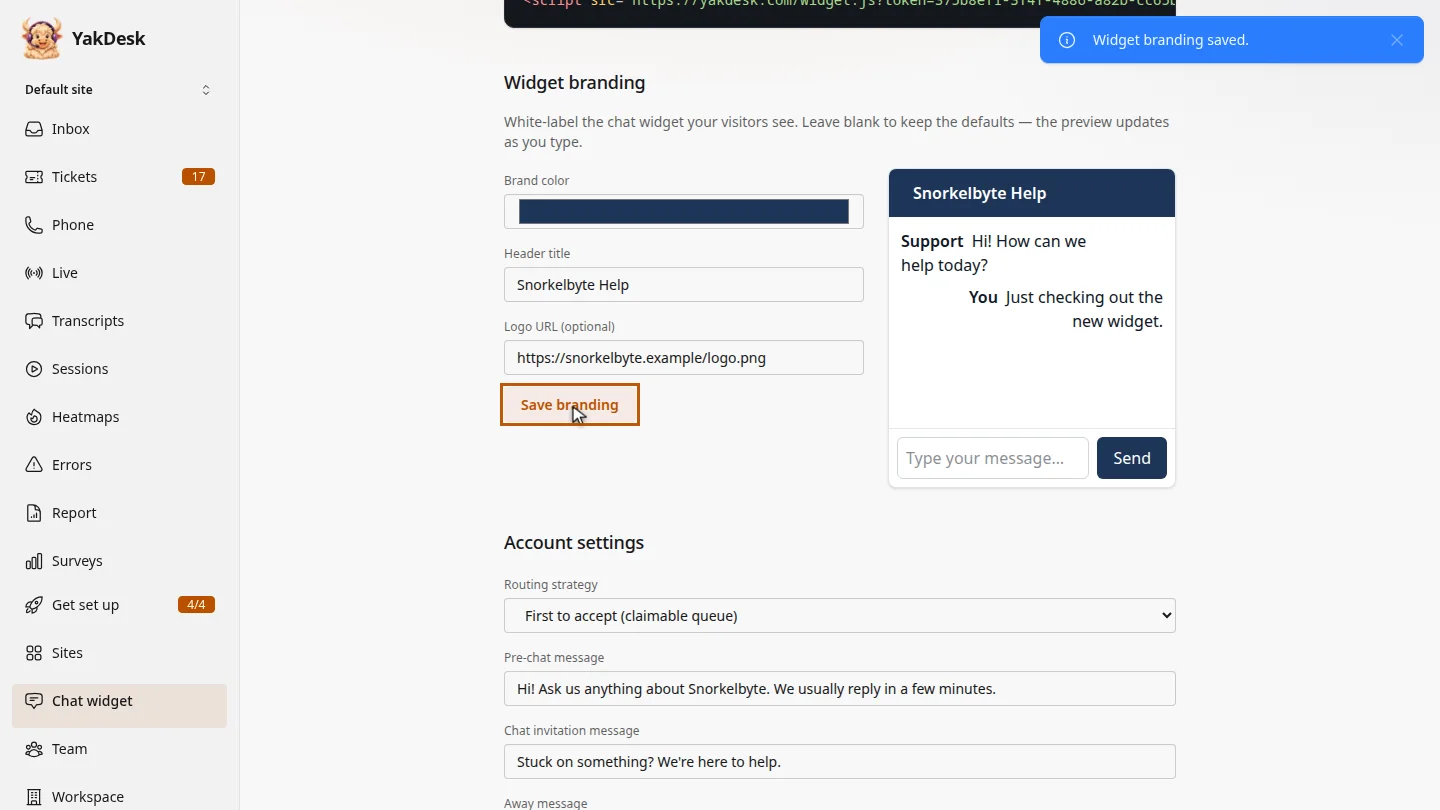
Save it ▶ 0:29
Select Save branding. A Widget branding saved. message confirms it.
Next steps
Updated 2026-11-09
white label brand color logo chat header widget theme